Editing Landscape Photographs with Luminar Neo
As a photographer, it is essential to keep up to date with new tools, gear, and software. I regularly edit my images in Adobe Lightroom and Photoshop, but I also enjoy exploring new tools available in the market. This not only helps me stay updated with the latest functionality but also opens up new possibilities in my work. Breaking away from the routine of using the same editing tools can be enlightening, and you may discover new techniques that you could incorporate into your existing workflow. I experimented with the affordable photo editing software Luminar Neo by Skylum, which offers some cool methods. In this blog, I will share my experiences by editing with a single shot and two edits!
For who is Luminar Neo?
Luminar Neo is a great tool for photographers of any skill level, from amateur to professional. Its user-friendly interface makes it so easy to start editing photos, even if you have no prior experience. Not only that, but Luminar Neo has unique features and tools that other software can't offer, helping you take your images to the next level. It looks like a fun and easy-to-understand software tool, so it's worth trying out to explore its full range of possibilities. From making subtle adjustments to transforming your photos completely, this could be a great addition to any photographer's toolbox!
one shot, Two edits!
In photography, sometimes a single shot can appear dull and lack the impact that I desire. I have a photograph just like that to experiment with editing within Luminar Neo. I'm excited to experiment with their AI-powered tools to see what I can create. I will be using the underneath photograph to create two completely different edits. The end goal is to showcase the incredible potential of this software and how a single, ordinary photo can be transformed into something truly special!
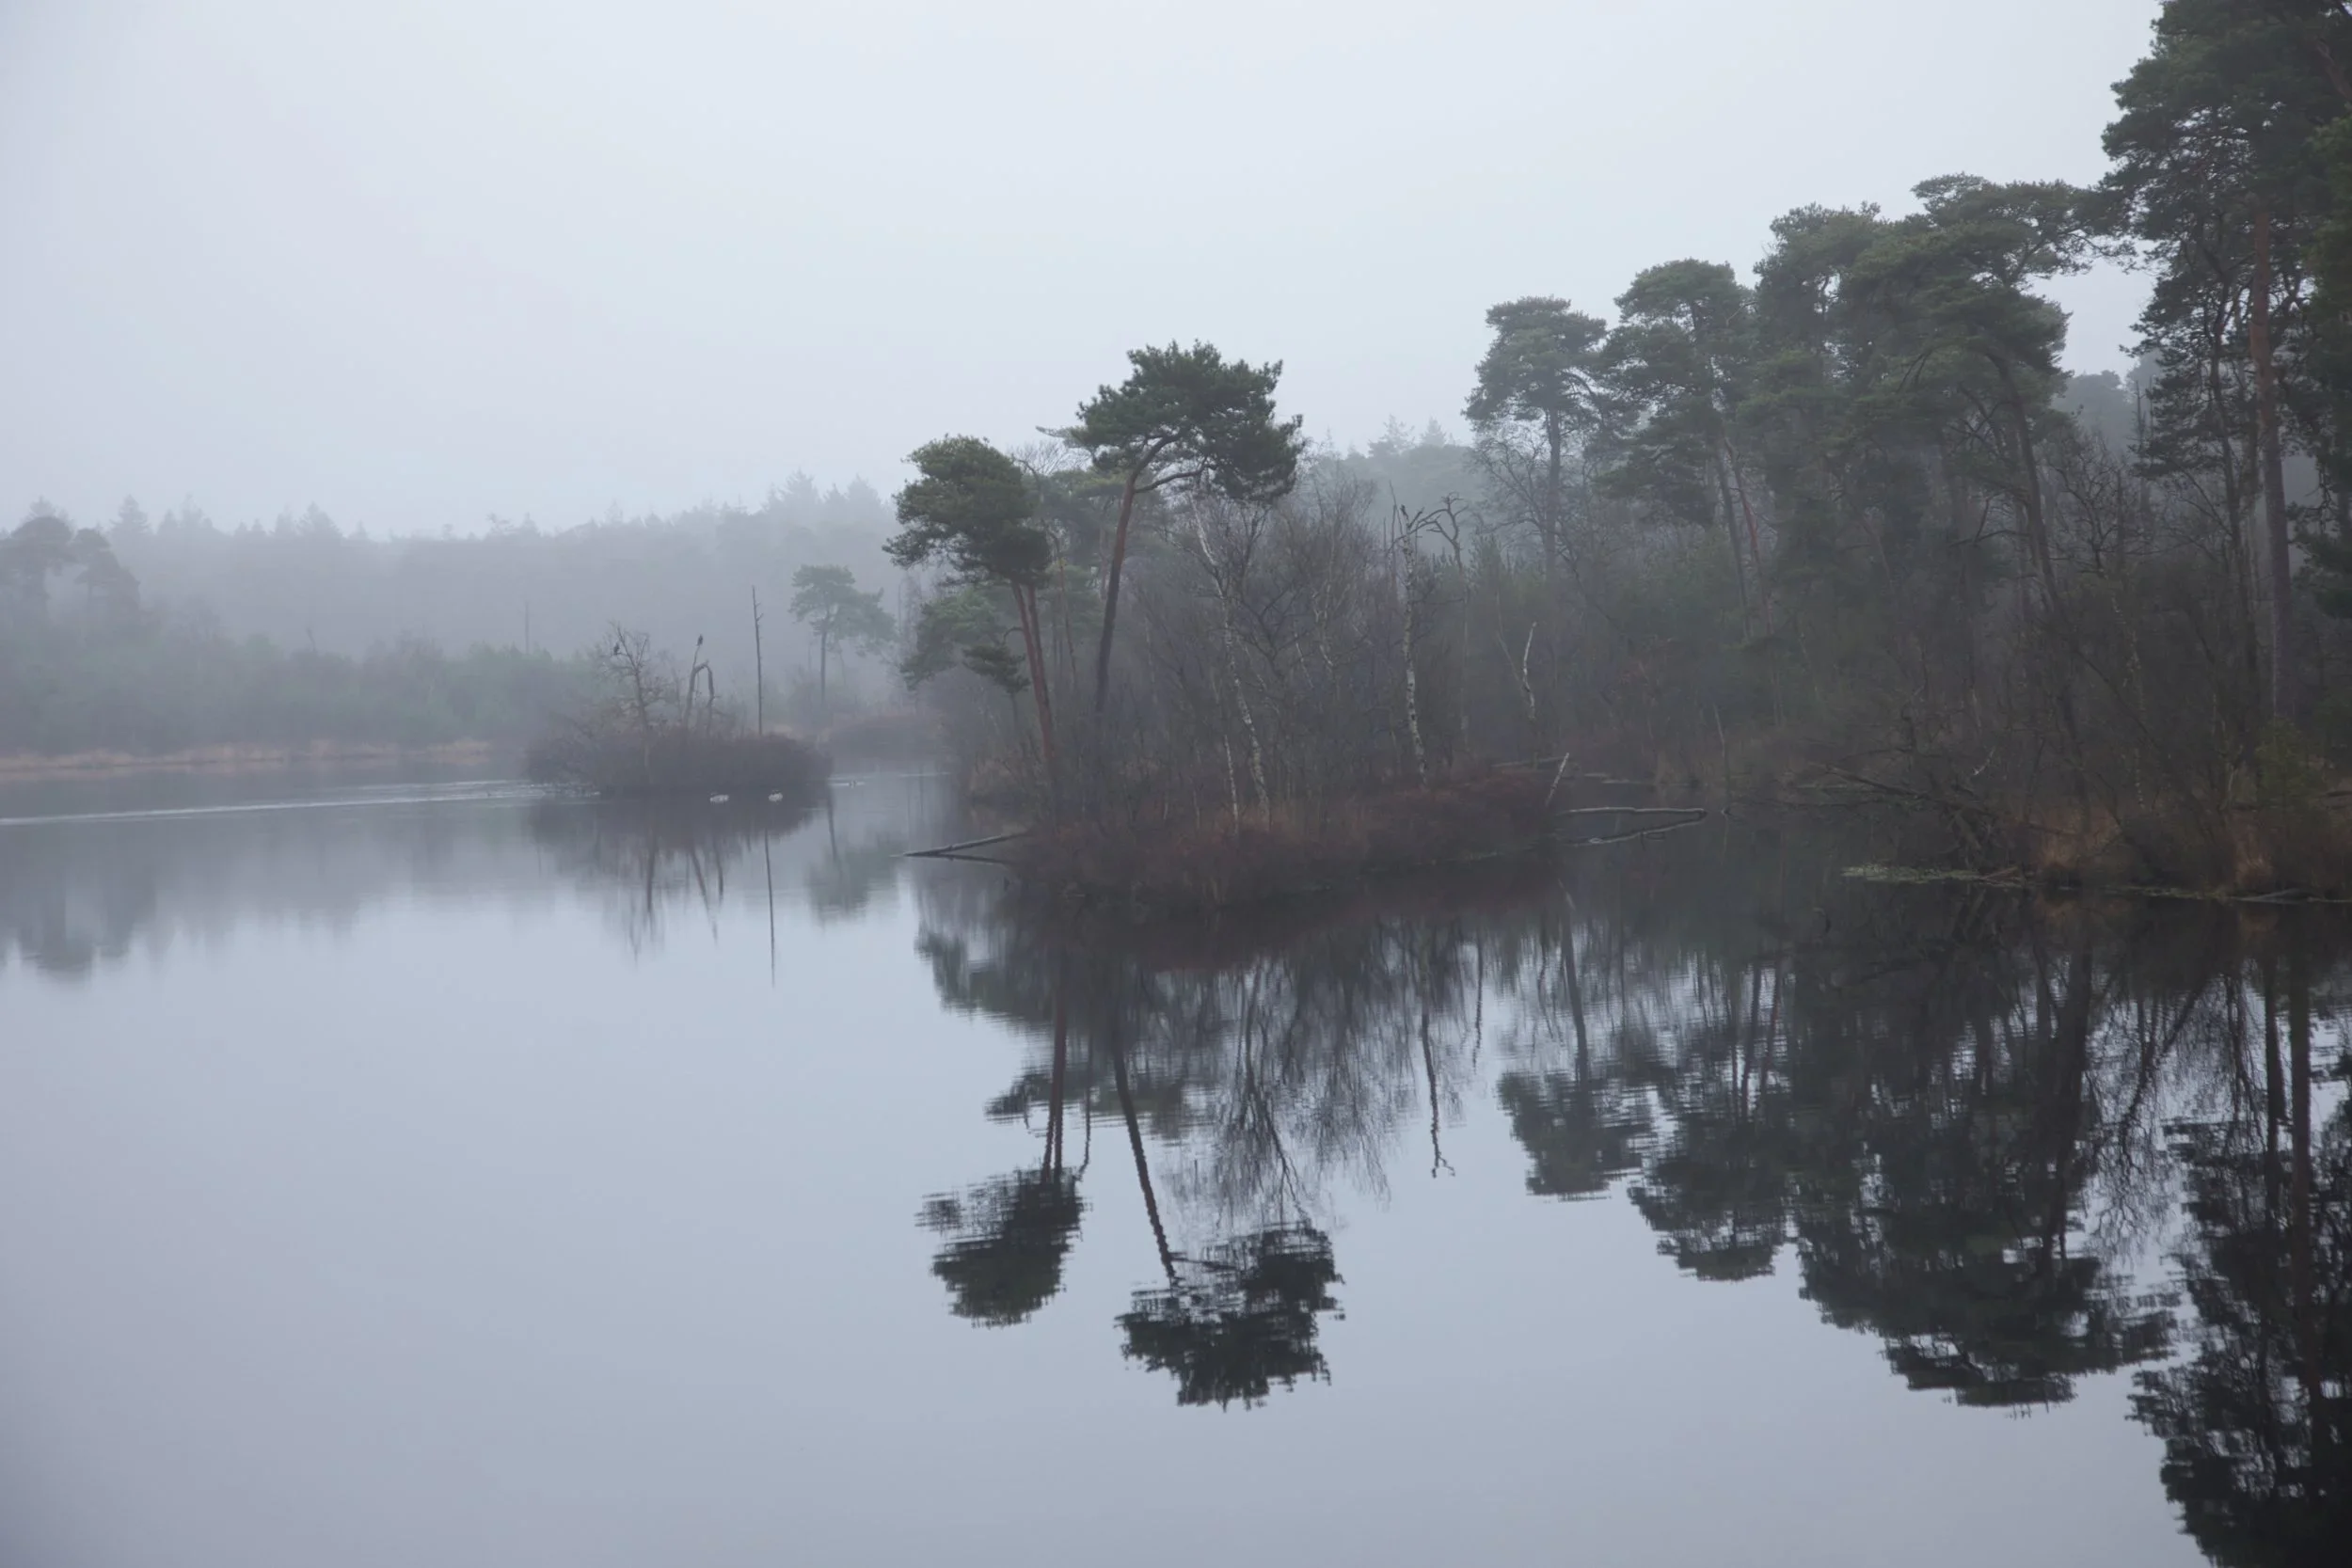
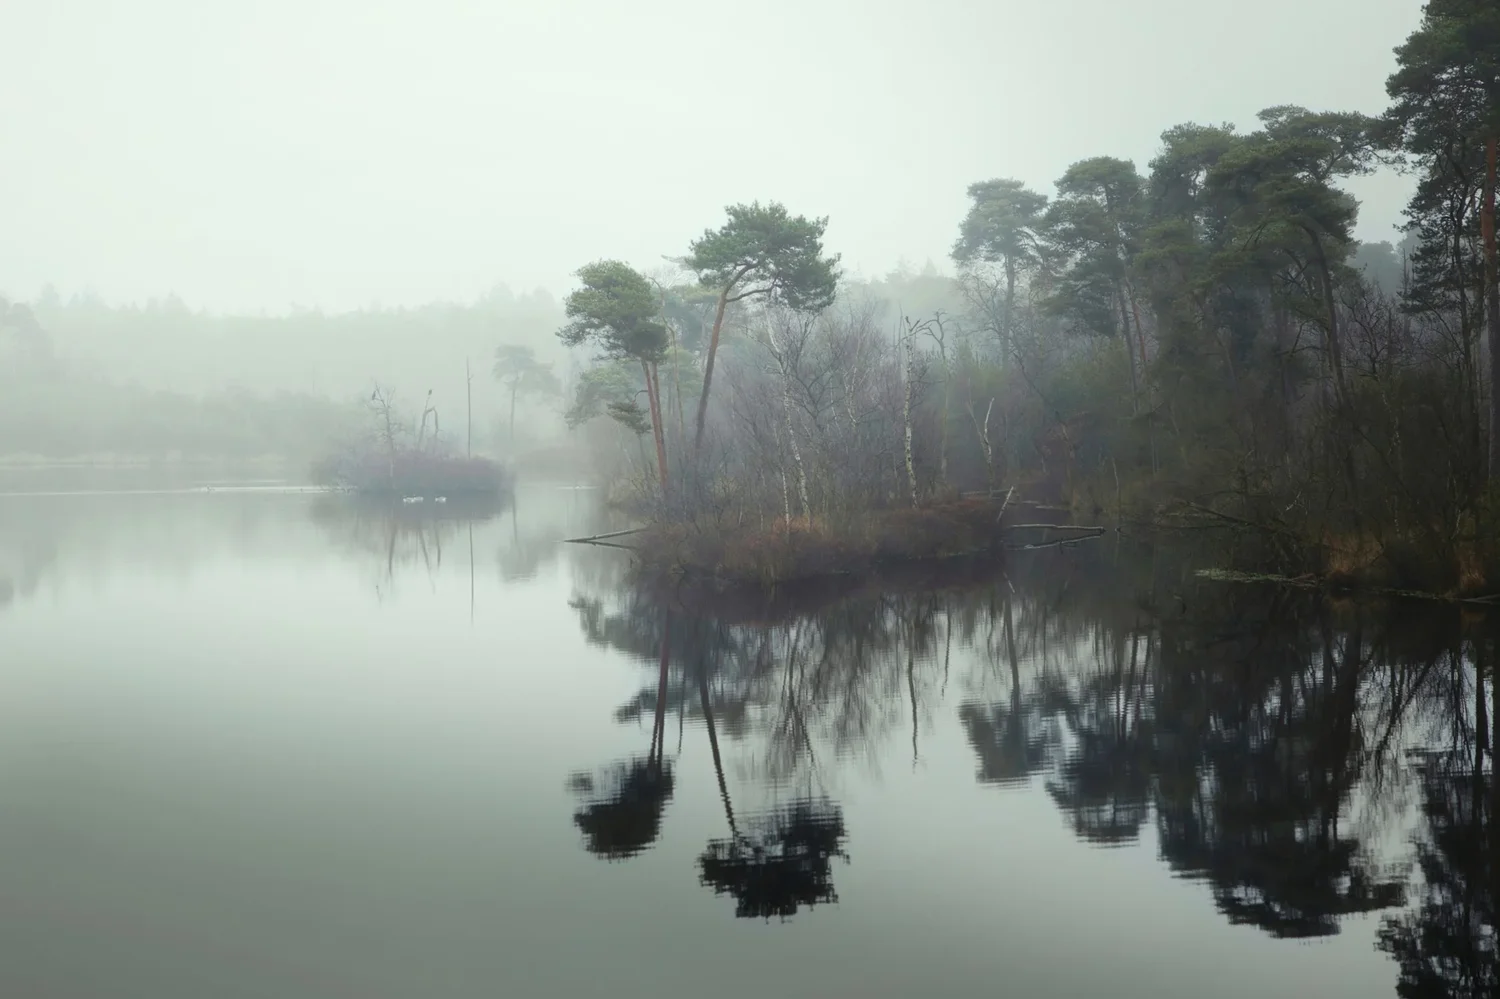
The original, unedited file.
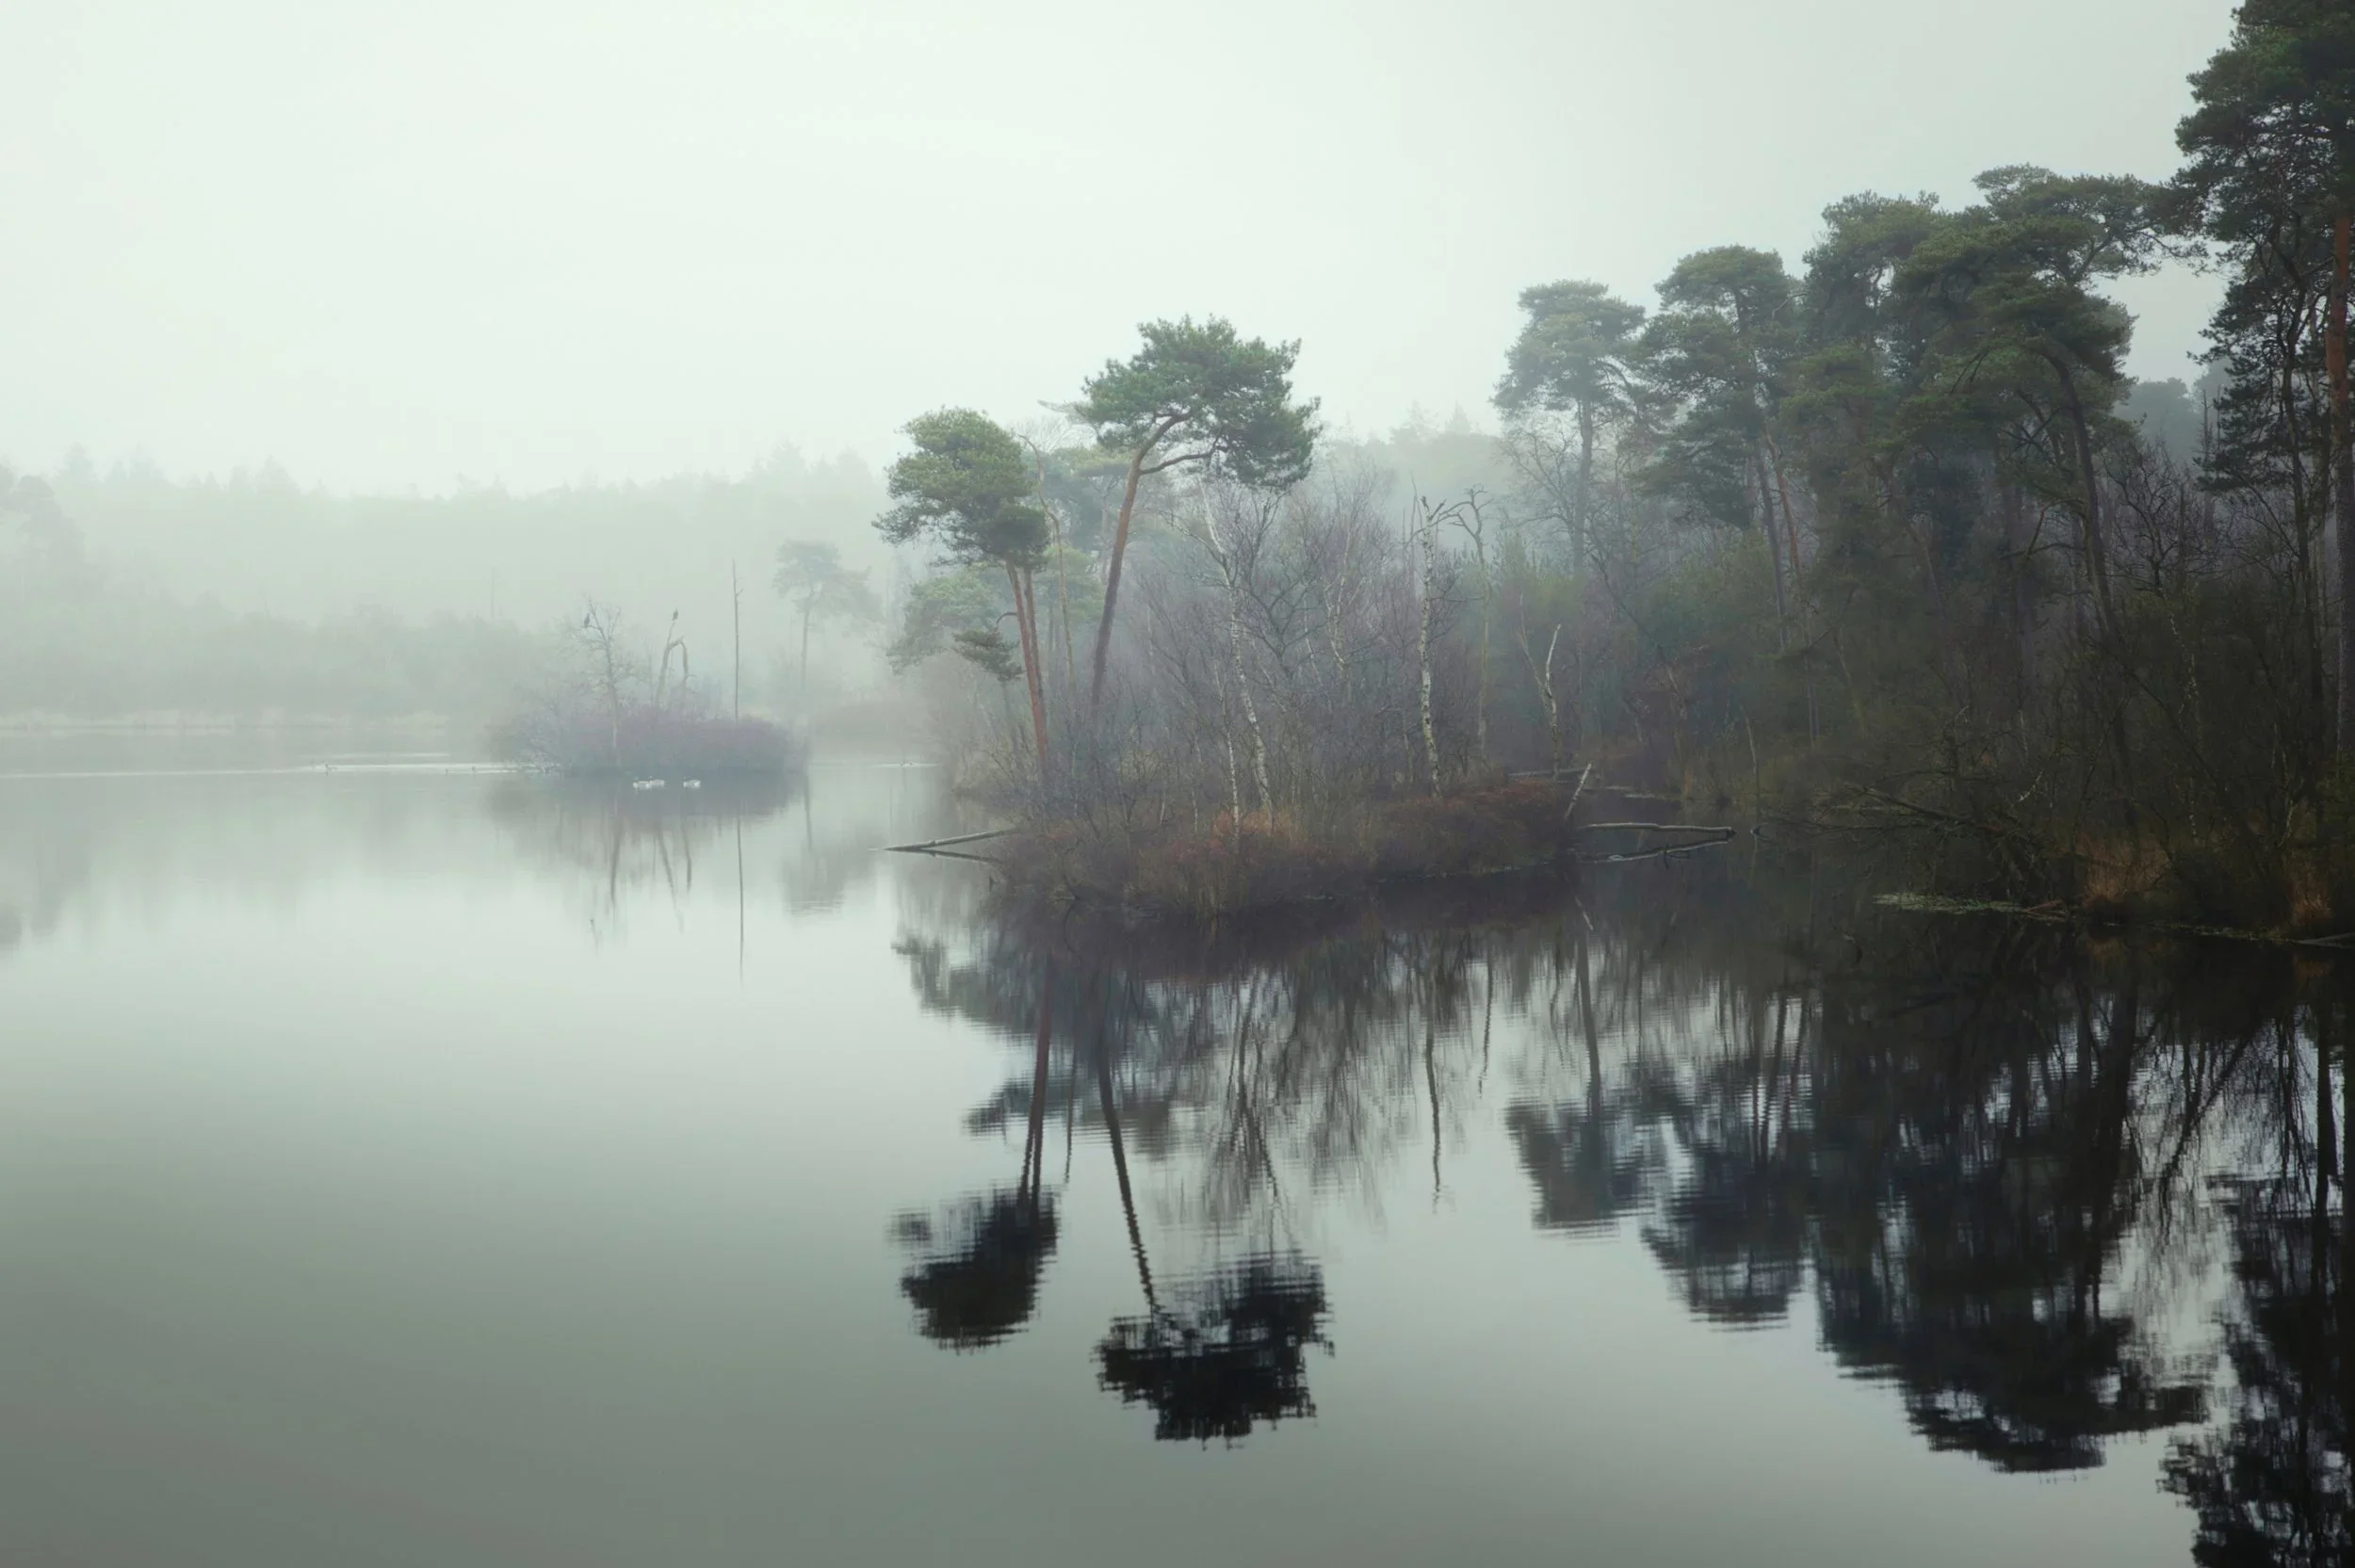
The first edit
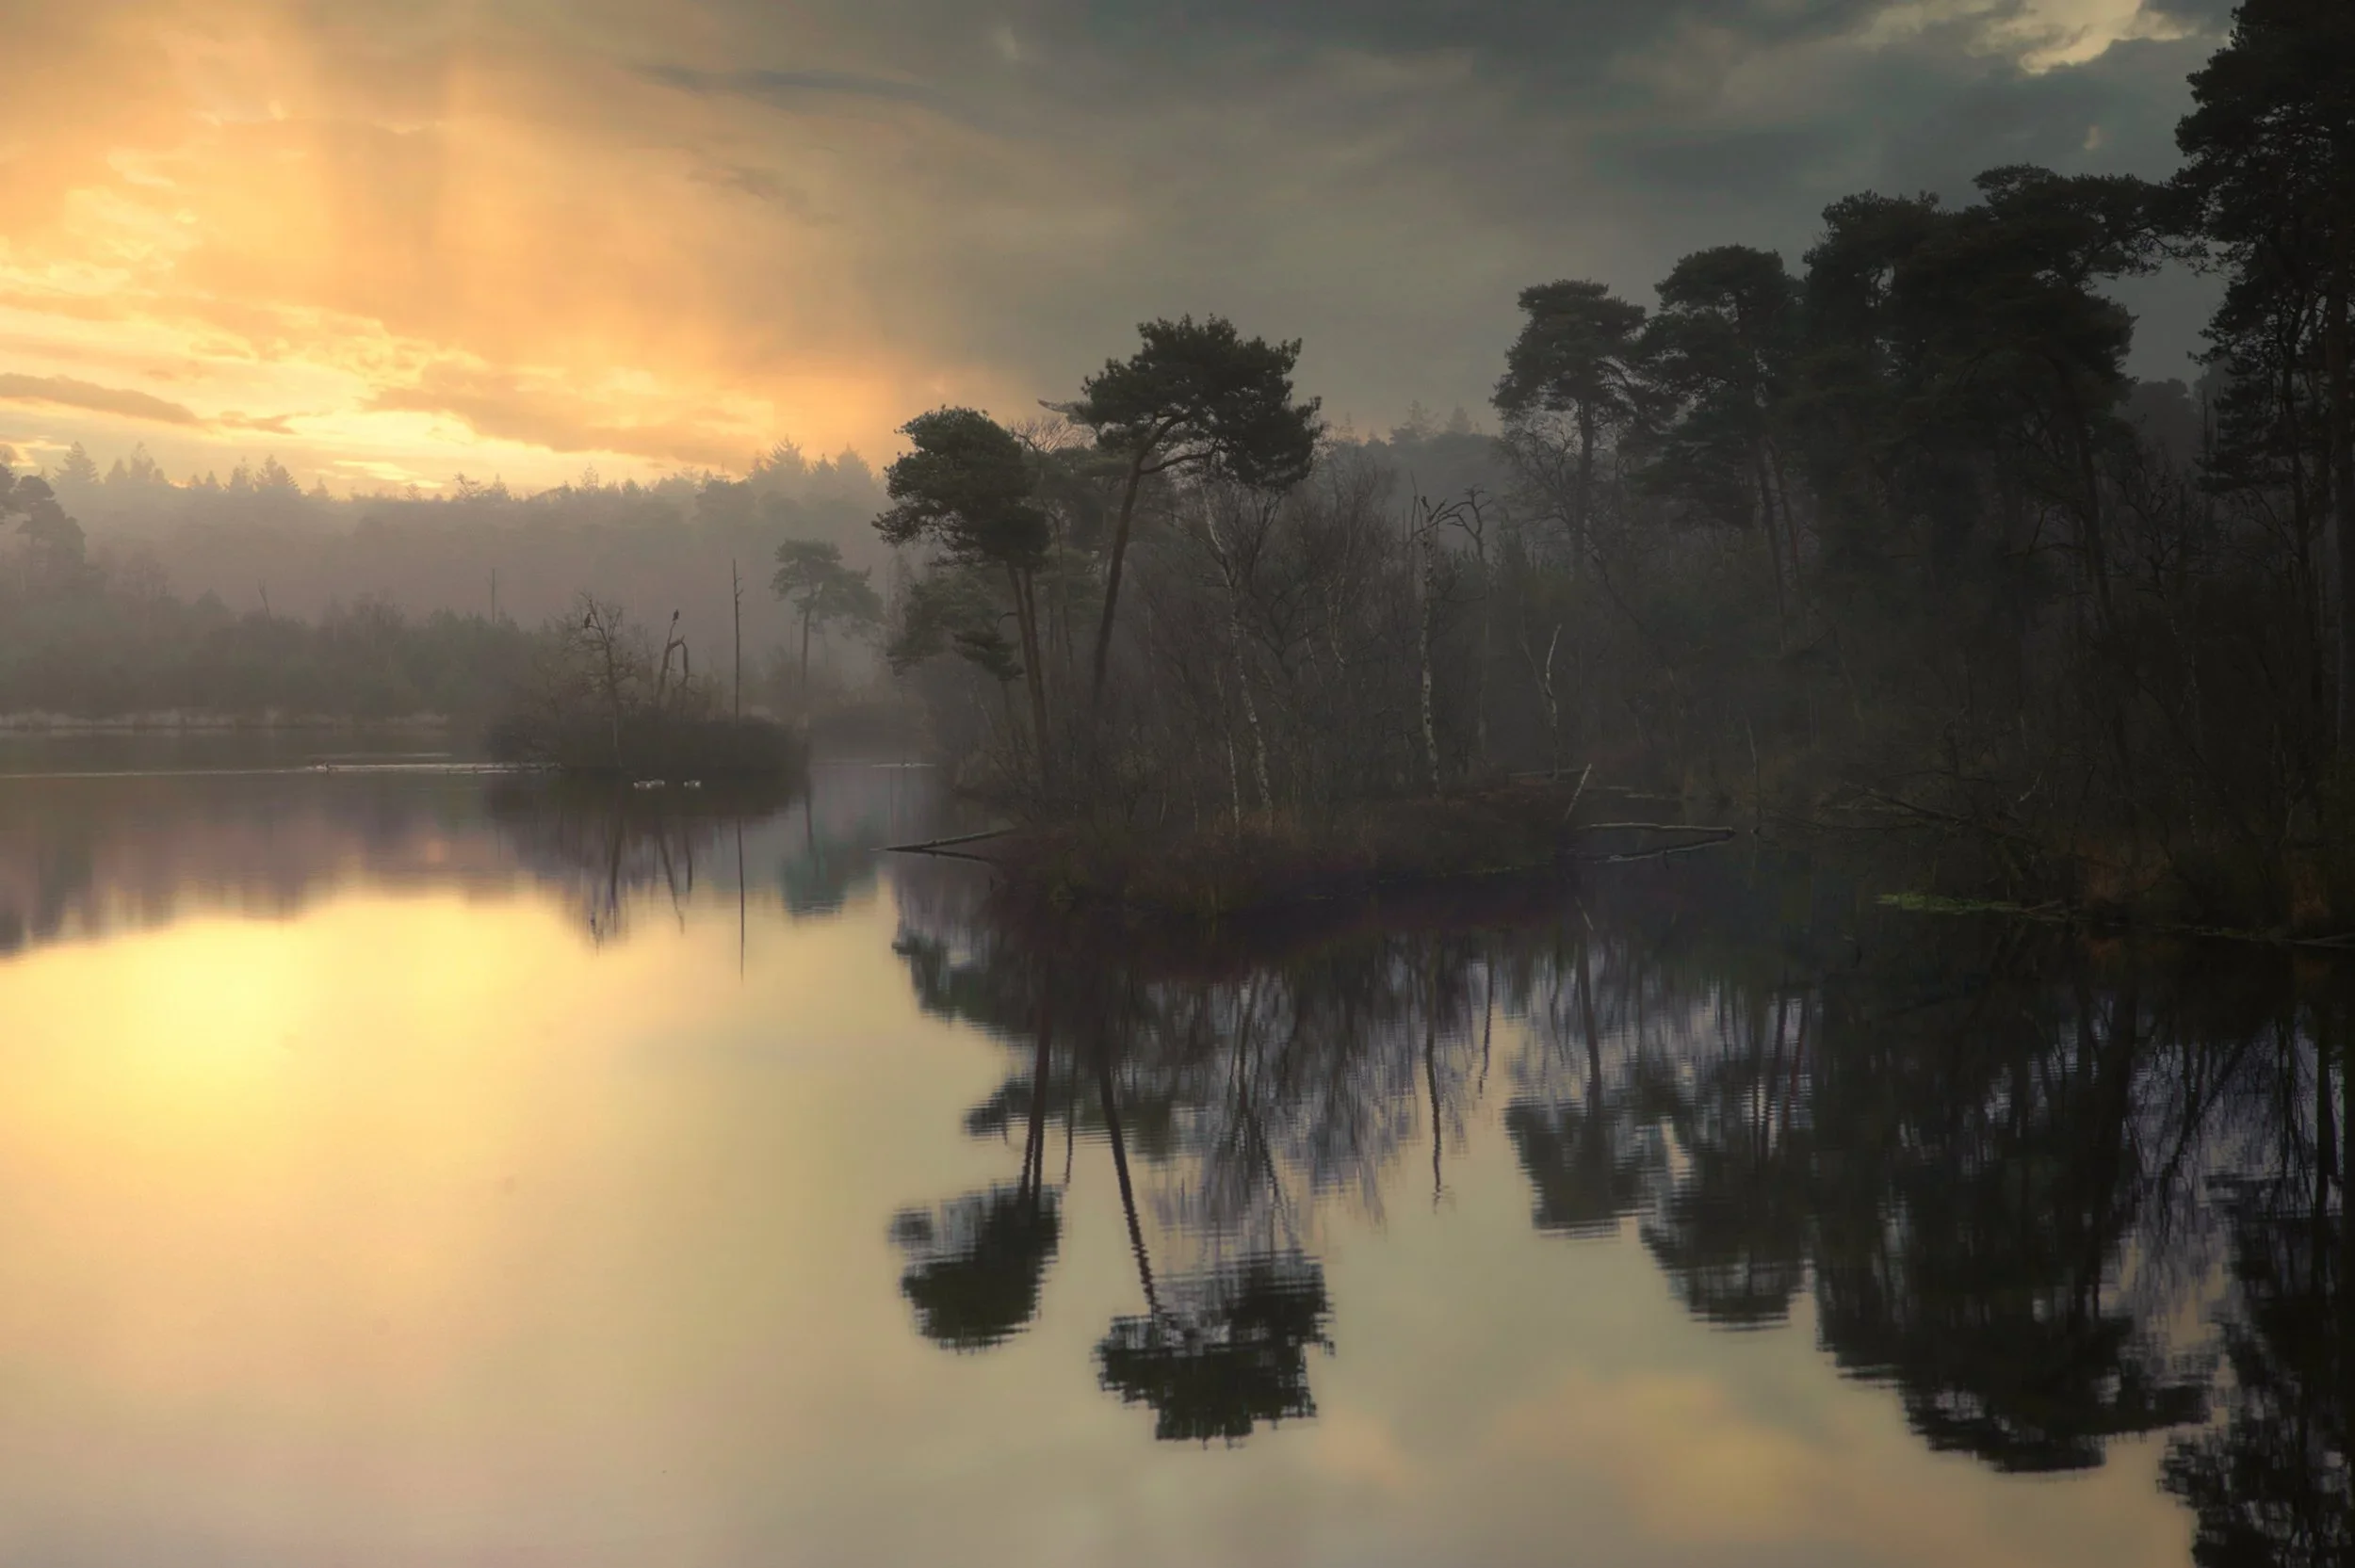
The second edit
I captured this image in the early hours at the Oisterwijkse bossen en vennen in The Netherlands, a magnificent natural wonder that is best experienced in the morning. After a long drive, I was greeted with changing weather upon my arrival, resulting in a grey ambience that I wasn't particularly fond of. Nevertheless, I am determined to turn this image into something truly extraordinary.
Edit 1: step-by-step, the subtle version
With this first edit, I wanted to create a moody, atmospheric image that would be edited in a subtle way. To achieve that, I started exploring the possibilities of Luminar Neo’s tools.

Shooting in RAW
Needless to say, Luminar Neo supports RAW files, which means you can take full advantage of the dynamic range and colour information captured by your camera. This allows you to make more precise and accurate edits to your images, resulting in a final product that truly captures the beauty and majesty of the landscapes you photograph.
The tools and features in Luminar Neo
When first opening the app, you will see a tool overview. For my first edit, I utilized the tools highlighted in the screenshot below. I applied various editing techniques to enhance the image and make it look more visually appealing. Especially with the tools that can manipulate light. By using the software's user-friendly interface, I was able to easily access the tools and make adjustments with ease and speed.
The Crop Tool
To start off, I like to make sure the horizon in my picture is straight. I always make sure to give my images a polished and professional look by straightening out the horizon. To help me with this, I use the AI crop tool which has a fantastic feature that automatically aligns the horizon for me. After that, I crop the image to my preferred composition. Taking these few simple steps can make a huge difference in the final result of my picture.
The Vignette Tool
I levelled the horizon and cropped the image before adding a vignette effect to darken the area around the trees. I then chose the spot where the light should be directed - in this case, the sky on the left - and then I brought the light intensity back up.
(Click for enlarment)
The Develop Tool
In this stage of the process, you'll start to witness the transformation. I wanted to give my image a dramatic feel and I accomplished that through the Develop Tool. This tool is amazingly powerful as it gives you total control over the exposure of the image, bringing out its natural brightness and vividness. By utilizing the sliders in Develop Mode, I brightened the image and breathed life into it. I not only altered the contrast and shadows but also played around with the colours. I changed the red tints to a green tone, creating a wondrous forest-like atmosphere. In no time, I made my vision a reality with just some small adjustments.
And finally, masking
I decided to make one more change in the Develop tool by using a Mask, something you can easily do in Luminar Neo. To add definition and a more dynamic feel, I used a Linear Gradient mask to darken the lower area in the water which gave the photo an even more dramatic look. Now my photo is finished! It's simple once you get feeling for it.
Edit 2: step-by-step, The drama queen!
For my second edit, I had a specific vision in mind, which was to create a moody and atmospheric image that would look edited noticeably and dramatically. To achieve this, I delved into the capabilities of Luminar Neo, discovering the impressive AI Sky Replacement feature along the way. This tool allowed me to effortlessly swap out the sky in my image, adding an extra layer of drama to my work. Let’s see how this drama queen worked out!

Enhancing the image with AI
Did you know that using the Enhance tool in Luminar Neo is an absolute ease? With just one click, you can significantly spice up your image in a second! The AI technology behind it is truly remarkable - the AI algorithms study your photo and make automated adjustments to enhance its colour, clarity, and overall appearance. No need to worry about manual adjustments anymore - this time-saving tool is here for the rescue!
Sky replacement
With the Sky Replacement tool in Luminar Neo, landscape photographers can now easily and quickly transform an uninspiring sky into a more dynamic and interesting photograph! You can quickly and easily switch up a dull sky with something far more exciting. I was curious to see what would work in this image, o I chose the one that suited this image perfectly, with its stunning sunset in the background. I love that the software blends the new sky into the photo for a realistic-looking finish, so it looks like it was always part of the picture. And, there's space to customise your sky even more to get the perfect effect. It's great that it takes on the reflections in the water too - so no more spending hours manually mirroring a sky in! All it takes is a few clicks.
Masking in the Color Tool
To give the water a more colourful reflection like you see in the sky, I used the Color Tool, which makes it easy to adjust the colours in your photos in a selective way. Within the tool, I, therefore, used the AI Mask to select only the part that contains the water in my image. All I had to do was click the button and it selected the water for me! I then had to add more colour to the water without affecting the rest of the image. Once it was selected, I was able to change the water's colour and make it pop out with a vibrant yellow, similar to the sky.
Last but not least: the Color Harmony Tool
I wanted to add the perfect finishing touch to my photo editing process, so I decided to try out the Color Harmony Tool in Luminar Neo. This tool is great - it brought balance and unity to all of the colours in my image. The trees had more contrast and golden tones that blended perfectly with the sunset in the sky and the water. The end result was an image that was visually eye-catching and perfectly cohesive. If you're looking for a quick and easy way to bring your photos from good to great, try out this tool!
My conclusion
I had a lot of fun experimenting with Luminar Neo's diverse range of creative tools, and I'm not done yet! The possibilities for transforming a single photograph are truly endless. If you're a landscape photographer looking for simplified creative photo editing tool, Luminar Neo is definitely worth considering. With its many options specifically designed for enhancing outdoor scenes, you can create images that truly capture the beauty of the natural world. The software offers many interesting extensions, such as HDR Merge, Noiseless AI, Supersharp AI, Upscale AI, Background Removal AI, and Focus Stacking, which all simplify and enhance the editing process, making it possible to achieve stunning results with ease and without prior editing experience. With a free trial available, I highly recommend giving it a try to see all the possibilities for yourself!
Luminar NEO is one year old! 🥳 And to celebrate, the company offers some great birthday packets!