The making of 'Dutch Silence II' with Adobe 📷
In this blog post, I will tell you more about the development of my latest series called 'Dutch Silence II and how I used the Adobe Lightroom and Adobe Photoshop subscriptions, to create the images from scratch. It contains a more in-depth insight into how I edit my Fine Art images and what creative tools I use within the Adobe Creative Cloud Photography plan. I have also made a series of videos for you to see how the different processes work.
The images produced in my Silence series are exclusively photographed, uniquely selected and edited in greater detail to become established Fine Art series. All images are created from my interests and vision as a photographer. They form a collection of pictures taken from various locations all around the world, all of which have a unique absence of sound. I am further capturing a feeling of tranquillity and remoteness invoked by the place and the use of a simplistic style remains essential when achieving extraordinary levels of silence. This way, I could focus on the characteristics of a particular place, without being distracted by other elements found all around.
my basic workflow process in adobe Lightroom
For these series, I wanted to create a calm and equal atmoshphere, like I did with my other Silence Series. I shoot my images quite dark, and since I shoot in RAW, I won’t loose any details in my editing process. My workflow usually starts by using local adjustments in Adobe Lightroom, such as the Lineair and Gradient Tools to execurate any lightsources in the image. It is fairly simple to use. I also use local Brush Tools, to make any corrections to a specific area of the photo. By dragging the selection mask, you can edit a specific area. You can then modify the exposure, contrast and other attributes to the mask by dragging the slides.
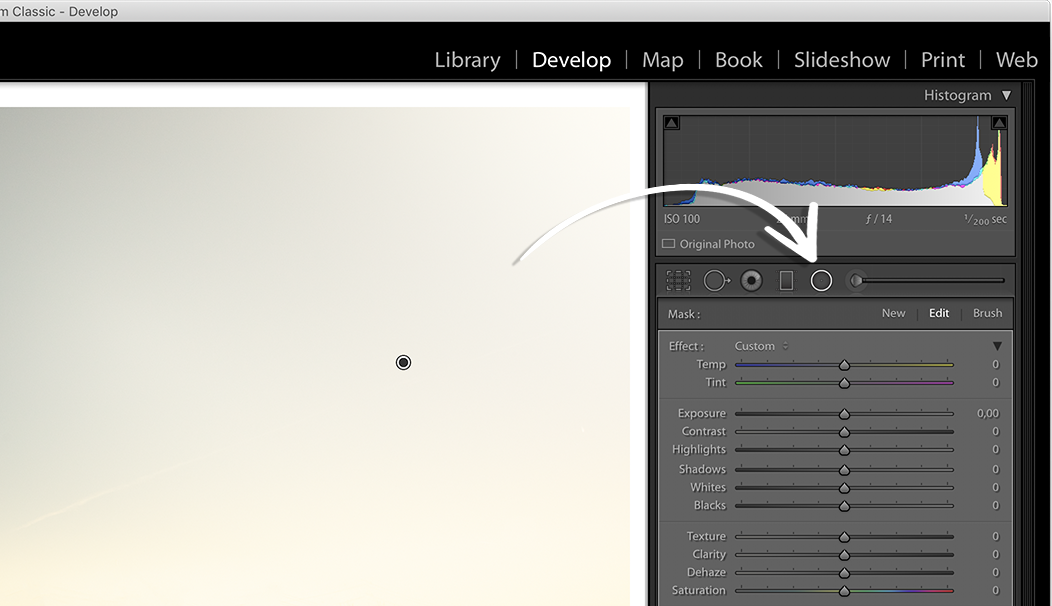
Adobe’s secret weapon: The Radial Filter in Lightroom
Watch the video underneath to see how I use these tools in my image called ‘Dutch Delight’:
Using Spot healing brush & stamp tool in Adobe Photoshop
Landscape photos often need more then local adjustments to balance a bright sky or lighten up a darker foreground. I use Adobe Photoshop for my finer detailed editing. I often remove unwanted objects, or add objects by cloning, to fix imperfections in my images. I don’t like many ‘distortions’ in my image, as they are distracting my subject.
Watch the video underneath to see how I use the Healing Brush and Stamp Tool in my image called ‘Dutch Delight’:


This image is called ‘Dutch Delight’, and was captured on a very cold morning in the beautiful place called Kinderdijk near Rotterdam, it forms part of the Unesco World Heritage site and is a place I often visit to capture the silence at sunrise.
my complete editing process with Adobe
Some of my images can be quite different then the original. For the subject to really stand out, there is a whole process in advance. In this particular image, I didn’t like the traffic on the highway, and the distracting grass in the foreground. I also liked the sun lightning up the little house, something I liked to make clearer. It was a lot of work, but I am pleased with the results. Watch the video underneath to see the whole editing process of this image called ‘Bordered’:


This image is called ‘Bordered’, it was captured in the green surroundings of Reeuwijk in South-Holland. The green Dutch countryside offers many fantastic cycling routes, where you will find tranquil sceneries such as here.
The content aware fill tool in Adobe Photoshop
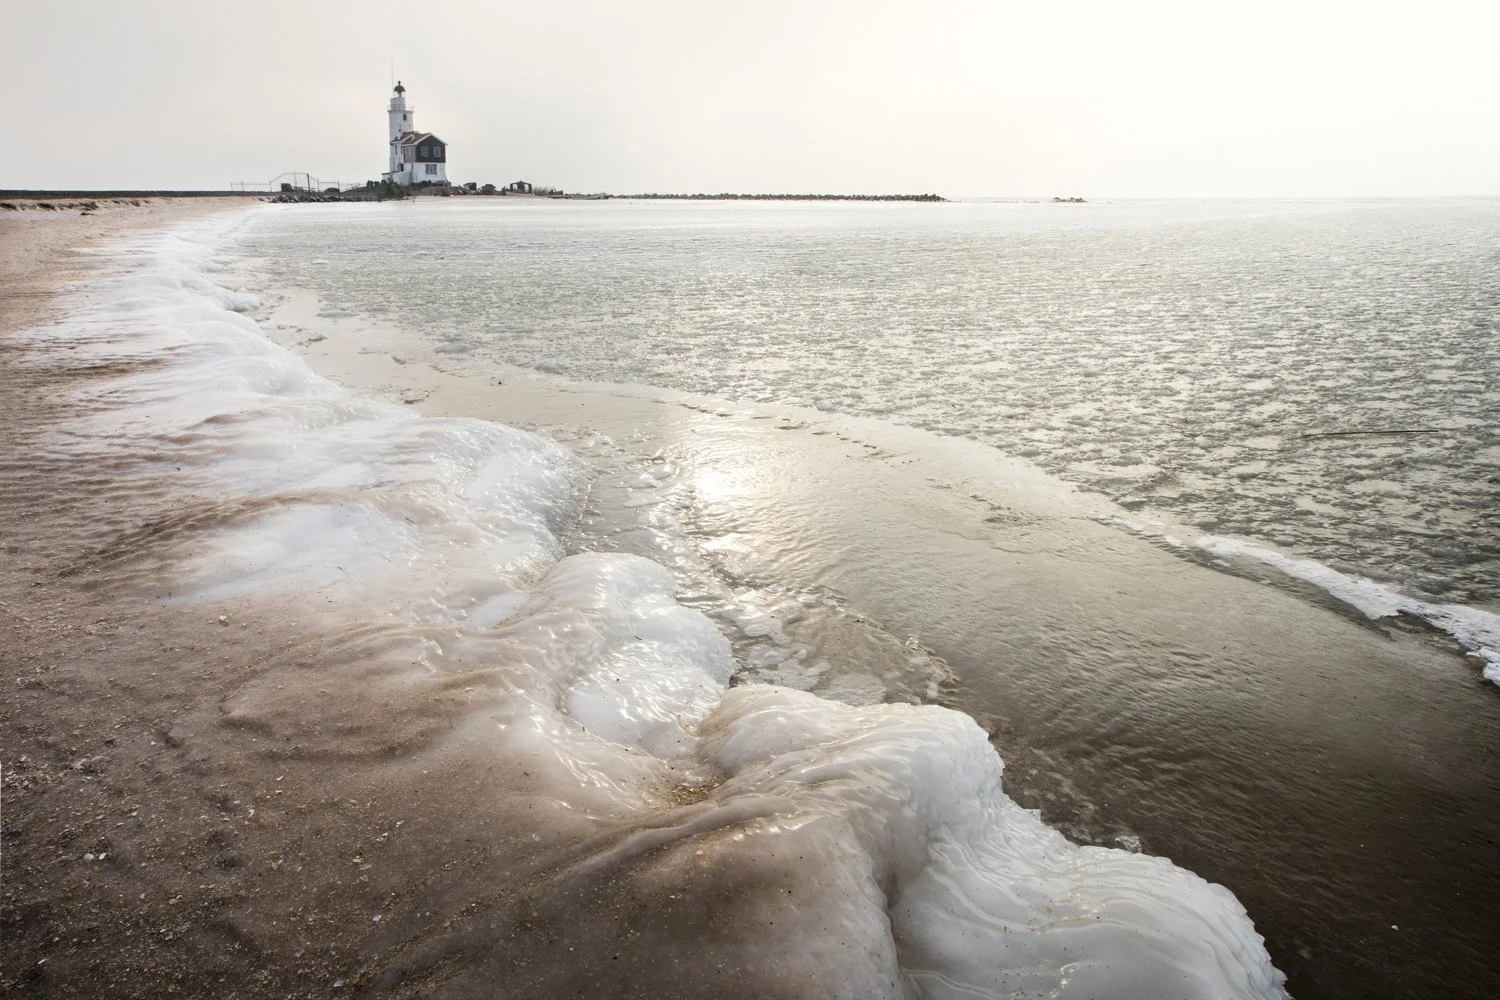
With this particular image, I din’t want to loose the shape of the ice in the front. Therefore, I had to crop the lighthouse quite tight, which was not the best composition, but knowing that the content aware fill tool would solve that problem. I simply used the Crop tool with its Content-Aware option to expand the upper part beyond its original boundaries and let it automatically fill the area with matching content. It automatically fills in the outside edges of the recomposed photo. When selecting the Crop tool, you can check the Content-Aware checkbox to turn on the Crop tool’s Content-Aware option.
This image is called ‘The Horse’, after its Dutch name, het Paard. A lighthouse situated in the historic village of Marken, in the North of Holland. This particular morning, it was very cold, and I loved the shapes of ice forming in the front, something you don’t see that often.
Dogde and burn technique in Adobe Photoshop
This is a simple tool to brighten the highlights and darken the shadows of any image. It adds more dimension and more attention which makes it focus more on your subject. Watch how I used the Dodge & Burn tool in ‘The Horse’ here:

This image is called ‘The Horse’, after its Dutch name, het Paard. A lighthouse situated in the historic village of Marken, in the North of Holland. This particular morning, it was very cold, and I loved the shapes of ice forming in the front, something you don’t see that often.
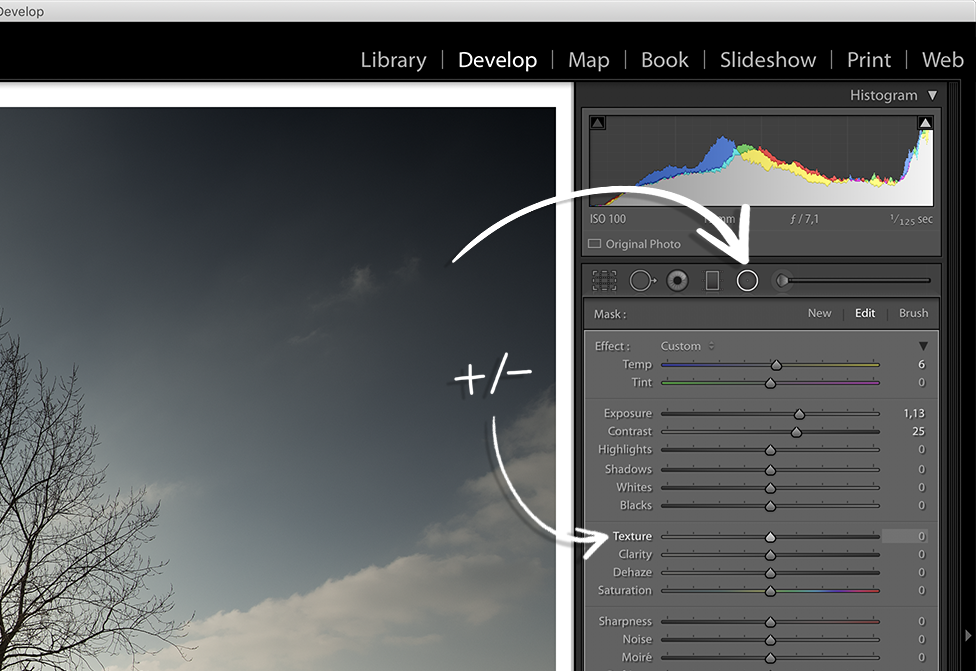
new feature in Adobe lightroom: Texture
Great news: you can now smoothen or accentuate details with the new Texture slider. You can apply texture to your photos both as a global adjustment and to specific parts of the photo as a local adjustment. To apply texture, select a photo and switch to the Develop module. Get that simplicity look by decreasing the Texture slider (-) for smooth landscape terrains; or simply increase (+) the amount to accentuate details (without affecting less detailed areas).
Watch the editing process of ‘Rows’ in this video and see how I applied the Texture tool in Adobe Lightroom:


This image is called ‘Rows’, it was captured in the flat countryside of Sealand. it is one of my favorite places to capture as you can look to the distance for miles ahead. With the everchanging Dutch skies and simple features you will meet, like the famous rows of trees you will find there everywhere you look.
Special requests?
If you would like to see more editing processes of my photoseries , then please leave a comment below!
This blogpost was written in Partnership with Adobe and created with Canon equipment. I want to extend a huge thank you to Adobe and TeamLewis for allowing me to have this great opportunity to show how I used these amazing and creative editing tools. It shows creativity can develop in an inspiring way and anything is possible. Discover more aboutthe Adobe Creative Cloud Photography plan here.

